Difference between revisions of "Dev Create Eclipse Project"
From ADF Docs
(→Steps) |
m (Reverted edits by Ecaxabu (Talk) to last revision by Renee.mckechnie) |
||
| (2 intermediate revisions by 2 users not shown) | |||
| Line 1: | Line 1: | ||
== Overview == | == Overview == | ||
| − | To develop an application and | + | To develop an application and commit the updates back to the SVN repository, the project needs to be set up through an IDE. |
| − | The following steps | + | The following steps set up an ADF app to update and commit the latest code to the SVN repository. |
== Steps == | == Steps == | ||
| − | * Follow the instructions to | + | * Follow the instructions to set up the [[Developers_Guide|Development Environment]]. |
* Install the [http://subclipse.tigris.org/ Subclipse] plug-in into Eclipse. | * Install the [http://subclipse.tigris.org/ Subclipse] plug-in into Eclipse. | ||
* In Eclipse, in the Project Explorer view, create a new project. | * In Eclipse, in the Project Explorer view, create a new project. | ||
| Line 12: | Line 12: | ||
** [[File:svn_apps_eclipse_01.jpg]] | ** [[File:svn_apps_eclipse_01.jpg]] | ||
* In the ''Project References'' dialog, do not select any other projects and click ''finish''. | * In the ''Project References'' dialog, do not select any other projects and click ''finish''. | ||
| − | * In the Project Explorer view, you will now see the project and that it is connected to the SVN App's repository. You can also see | + | * In the Project Explorer view, you will now see the project and that it is connected to the SVN App's repository. You can also see your working copy from the SVN repository. |
** [[File:svn_apps_eclipse_02.jpg]] | ** [[File:svn_apps_eclipse_02.jpg]] | ||
| + | |||
| + | [[Category: How-to Guide]] | ||
Latest revision as of 17:42, 24 November 2010
Overview
To develop an application and commit the updates back to the SVN repository, the project needs to be set up through an IDE.
The following steps set up an ADF app to update and commit the latest code to the SVN repository.
Steps
- Follow the instructions to set up the Development Environment.
- Install the Subclipse plug-in into Eclipse.
- In Eclipse, in the Project Explorer view, create a new project.
- In the New Project dialog, select either Project or CFML Project.
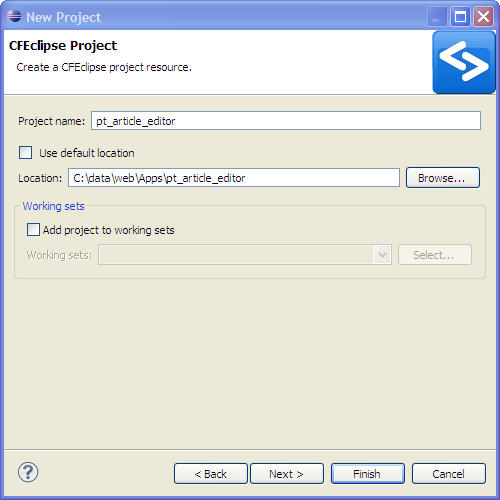
- Enter the project name in the text field. Uncheck the Use default location and enter the path for the SVN checked out app that was setup through the Development Environment.
- In the Project References dialog, do not select any other projects and click finish.
- In the Project Explorer view, you will now see the project and that it is connected to the SVN App's repository. You can also see your working copy from the SVN repository.

